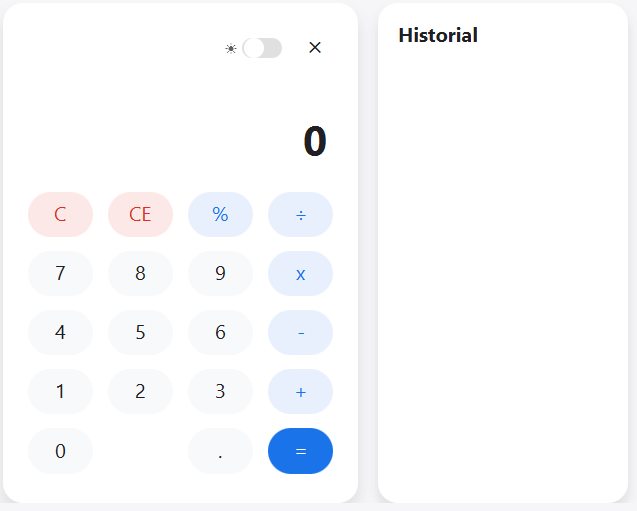
Calculadora Animada con Tema Oscuro en JavaFX
Aprende a crear una calculadora moderna con diseño fluido tipo app móvil, animaciones ScaleTransition y soporte nativo para Tema Oscuro.
3 de marzo de 2026 • 12 min de lectura
En este tutorial de nivel intermedio, construiremos desde cero una Calculadora Moderna en JavaFX. Si estás cansado de las interfaces genéricas grises, este artículo te mostrará cómo crear algo que parezca y se sienta como una aplicación nativa real.
Vamos a implementar tres grandes pilares:
- Tema Dinámico Claro/Oscuro modificando variables globales de CSS.
- Animaciones Fluidas utilizando
ScaleTransitionpara dar feedback táctil a cada botón. - UI Libre de Bordes (Undecorated) creando nuestros propios controles de ventana minimizando el uso de la clásica barra blanca de Windows.
Estructura del Proyecto
Construiremos tres componentes fundamentales usando puramente Java y CSS (nada de archivos .fxml complejos).
App.java: Configurador de la ventana principal fluida.Calculator.java: Lógica matemática y estado subyacente de la calculadora.CalculatorUI.java: Creación modular y enlazado de nuestros componentes visuales.style.css: Toda la magia y colores que dan vida a la arquitectura visual.
1. El modelo Lógico: Calculator.java
La matemática detrás de la calculadora para manejar operaciones continuas y el guardado en historiales. Creamos una clase plana donde separamos por completo el estado matemático de lo visual.
package com.calculadora;

public class Calculator {
    private double currentAnsw;
    private double currentValue;
    private String currentOperator;
    private boolean isNewOperation;

    public Calculator() {
        reset();
    }

    public void reset() {
        currentAnsw = 0;
        currentValue = 0;
        currentOperator = "";
        isNewOperation = true;
    }

    public void setOperator(String operator) {
        this.currentOperator = operator;
        this.isNewOperation = true;
    }

    // Called when a number button is pressed
    public void addDigitToCurrentValue(String digit, String currentDisplayContent) {
        if (isNewOperation) {
            currentDisplayContent = "";
            isNewOperation = false;
        }

        if (digit.equals(".") && currentDisplayContent.contains(".")) return;
        if (currentDisplayContent.equals("0") && !digit.equals(".")) currentDisplayContent = "";

        currentDisplayContent += digit;

        try {
            currentValue = Double.parseDouble(currentDisplayContent);
        } catch (NumberFormatException e) {
            currentValue = 0;
        }
    }

    public void setCurrentValue(double value) { this.currentValue = value; }
    public double getCurrentValue() { return currentValue; }
    public void setCurrentAnsw(double value) { this.currentAnsw = value; }
    public double getCurrentAnsw() { return currentAnsw; }

    public void saveCurrentToAnsw() {
        this.currentAnsw = this.currentValue;
        this.isNewOperation = true;
    }

    public boolean isNewOperation() { return isNewOperation; }
    public void setNewOperation(boolean isNewOperation) { this.isNewOperation = isNewOperation; }
    public String getCurrentOperator() { return currentOperator; }

    public double calculate() throws ArithmeticException {
        double result = 0;
        switch (currentOperator) {
            case "+": result = currentAnsw + currentValue; break;
            case "-": result = currentAnsw - currentValue; break;
            case "x":
            case "*": result = currentAnsw * currentValue; break;
            case "÷":
            case "/":
                if (currentValue == 0) throw new ArithmeticException("Division by zero");
                result = currentAnsw / currentValue; break;
            default: result = currentValue;
        }
        this.currentAnsw = result;
        this.isNewOperation = true;
        this.currentOperator = "";
        return result;
    }
}
2. La Magia del CSS: Tema Oscuro Modular
El truco para soportar colores en múltiples temas recae en las variables inyectadas. Al definir variables como -btn-num-bg al nivel de .root y sobreescribirlas dentro de .dark-theme, basta con añadir o quitar esa clase padre (root.getStyleClass().add("dark-theme")) para recolorear instantáneamente el software completo sin reiniciar nuestra vista.
/* Variables para Tema Claro */
.root {
    -bg-color: #f0f2f5;
    -calc-bg: #ffffff;
    -display-bg: transparent;
    -text-main: #202124;
    -text-secondary: #5f6368;

    /* Botones numericos */
    -btn-num-bg: #f8f9fa;
    -btn-num-text: #202124;

    /* Botones de operadores (+, -, *, /) */
    -btn-op-bg: #e8f0fe;
    -btn-op-text: #1a73e8;
    -btn-op-hover: #d2e3fc;

    /* Historial y Varios */
    -history-bg: #ffffff;
    -history-text: #5f6368;

    /* Bordes y sombras */
    -shadow-color: rgba(0, 0, 0, 0.1);

    -fx-font-family: 'Segoe UI', 'Inter', sans-serif;
    -fx-background-color: -bg-color;
}

/* Redefiniendo las variables si está el Tema Oscuro Activo */
.dark-theme {
    -bg-color: #121212;
    -calc-bg: #1e1e1e;
    -text-main: #ffffff;
    -text-secondary: #aaaaaa;

    -btn-num-bg: #2c2c2c;
    -btn-num-text: #ffffff;

    -btn-op-bg: #2a3a52;
    -btn-op-text: #8ab4f8;
    -btn-op-hover: #3b5073;

    -history-bg: #1e1e1e;
    -history-text: #aaaaaa;
    -shadow-color: rgba(0, 0, 0, 0.5);

    -fx-background-color: -bg-color; /* Aplica al contenedor principal por defecto */
}

/* --- ESTILOS PRINCIPALES --- */

.calculator-container {
    -fx-background-color: -calc-bg;
    -fx-background-radius: 20px;
    -fx-padding: 30px 25px;
    -fx-effect: dropshadow(three-pass-box, -shadow-color, 20, 0, 0, 10);
}

.calc-button {
    -fx-background-radius: 50px;
    -fx-font-size: 20px;
    -fx-font-weight: 600;
    -fx-cursor: hand;
    -fx-pref-width: 65px;
    -fx-pref-height: 65px;
}

/* Solo heredamos colores */
.btn-numeric {
    -fx-background-color: -btn-num-bg;
    -fx-text-fill: -btn-num-text;
}

.btn-operator {
    -fx-background-color: -btn-op-bg;
    -fx-text-fill: -btn-op-text;
}

.btn-operator:hover {
    -fx-background-color: -btn-op-hover;
}

.window-close-btn {
    -fx-background-color: transparent;
    -fx-text-fill: -text-main;
    -fx-font-size: 16px;
    -fx-font-weight: bold;
    -fx-cursor: hand;
    -fx-padding: 5px 10px;
    -fx-background-radius: 50%;
}
.window-close-btn:hover {
    -fx-background-color: #fce8e6;
    -fx-text-fill: #d93025;
}
3. UI Interactiva y Nodos JavaFX: CalculatorUI.java
Aquí reside gran parte de la implementación. Definiremos la animación genérica de presión de botones y el método que envuelve toda nuestra experiencia minimizable.
package com.calculadora;

import javafx.animation.ScaleTransition;
import javafx.collections.FXCollections;
import javafx.collections.ObservableList;
import javafx.geometry.Pos;
import javafx.scene.Parent;
import javafx.scene.control.*;
import javafx.scene.layout.*;
import javafx.scene.paint.Color;
import javafx.scene.shape.*;
import javafx.scene.text.Text;
import javafx.util.Duration;
import javafx.stage.Stage;
import javafx.application.Platform;

public class CalculatorUI {

    private VBox rootPane;
    private Calculator logic;
    private Text themeIcon;
    private boolean isDarkMode = false;

    private double xOffset = 0;
    private double yOffset = 0;

    public CalculatorUI() {
        logic = new Calculator();
        buildUI();
    }

    private void buildUI() {
        HBox appContainer = new HBox(20);
        appContainer.setAlignment(Pos.CENTER);

        // --- 1. Top Bar & Window Controls ---
        HBox topBar = new HBox(15);
        topBar.setAlignment(Pos.CENTER_RIGHT);

        Button closeBtn = new Button("✕");
        closeBtn.getStyleClass().add("window-close-btn");
        closeBtn.setOnAction(e -> Platform.exit());

        topBar.getChildren().addAll(createThemeToggle(), closeBtn);

        // --- 2. Main Calc Container ---
        VBox calculatorContainer = new VBox(15);
        calculatorContainer.getStyleClass().add("calculator-container");

        // [Display Setup...]

        // Numpad Area
        GridPane numpadGrid = new GridPane();
        numpadGrid.setHgap(15); numpadGrid.setVgap(15);

        // (Agrega los botones numéricos y operadores a las filas y columnas...)
        numpadGrid.add(createNumericButton("7"), 0, 1);
        numpadGrid.add(createOperatorButton("x", "btn-operator"), 3, 1);

        calculatorContainer.getChildren().addAll(topBar, numpadGrid);

        appContainer.getChildren().add(calculatorContainer);

        // --- Wrapper global ---
        rootPane = new VBox(appContainer);
        rootPane.setAlignment(Pos.CENTER);
        rootPane.getStyleClass().add("light-theme");
    }

    public Parent getView() { return rootPane; }

    // --- Window Dragging ---
    public void setupDraggableWindow(Stage stage) {
        rootPane.setOnMousePressed(event -> {
            xOffset = event.getSceneX();
            yOffset = event.getSceneY();
        });
        rootPane.setOnMouseDragged(event -> {
            stage.setX(event.getScreenX() - xOffset);
            stage.setY(event.getScreenY() - yOffset);
        });
    }

    // --- Animación de Presión Táctil ---
    private Button createNumericButton(String text) {
        Button btn = new Button(text);
        btn.getStyleClass().addAll("calc-button", "btn-numeric");

        // Efecto tipo muelle / Bounce
        btn.setOnMousePressed(e -> {
            ScaleTransition st = new ScaleTransition(Duration.millis(50), btn);
            st.setToX(0.9); st.setToY(0.9);
            st.play();
        });
        btn.setOnMouseReleased(e -> {
            ScaleTransition st = new ScaleTransition(Duration.millis(100), btn);
            st.setToX(1.0); st.setToY(1.0);
            st.play();
        });

        // (Enlazar aquí la llamada a tu 'logic.handleText(text)'...)
        return btn;
    }

    // Custom Toggle Switch
    private Region createThemeToggle() {
        HBox toggleContainer = new HBox(5);
        toggleContainer.setAlignment(Pos.CENTER);

        Rectangle bg = new Rectangle(40, 20);
        bg.setArcWidth(20); bg.setArcHeight(20);
        bg.setFill(Color.web("#e0e0e0")); // switch background

        Circle thumb = new Circle(10);
        thumb.setFill(Color.WHITE);

        HBox switchWrapper = new HBox(thumb);
        switchWrapper.setAlignment(Pos.CENTER_LEFT);

        themeIcon = new Text("☀"); // Unicode que soporta multiples fuentes
        themeIcon.setFill(Color.web("#5f6368"));

        StackPane stack = new StackPane(bg, switchWrapper);
        stack.setOnMouseClicked(e -> {
            isDarkMode = !isDarkMode;
            if (isDarkMode) {
                switchWrapper.setAlignment(Pos.CENTER_RIGHT);
                rootPane.getStyleClass().add("dark-theme");
                themeIcon.setText("🌙");
            } else {
                switchWrapper.setAlignment(Pos.CENTER_LEFT);
                rootPane.getStyleClass().remove("dark-theme");
                themeIcon.setText("☀");
            }
        });

        toggleContainer.getChildren().addAll(themeIcon, stack);
        return toggleContainer;
    }
}
4. Inicialización Main sin Bordes: App.java
Iniciamos la aplicación y configuramos StageStyle.TRANSPARENT. Esto deshabilitará activamente el clásico recuadro de ventanas que da el sistema operativo pero respetando la escena principal, lo cual lograremos llenando el fondo con Color.TRANSPARENT.
package com.calculadora;

import javafx.application.Application;
import javafx.scene.Scene;
import javafx.stage.Stage;
import javafx.stage.StageStyle;
import javafx.scene.paint.Color;

public class App extends Application {

    @Override
    public void start(Stage primaryStage) {
        CalculatorUI calculatorUI = new CalculatorUI();

        // Creamos la ventana de 700x500
        Scene scene = new Scene(calculatorUI.getView(), 700, 500);
        // Desactivamos el fondo sólido blanco/gris
        scene.setFill(Color.TRANSPARENT);

        scene.getStylesheets().add(getClass().getResource("/css/style.css").toExternalForm());

        // Apagamos los controles decorativos y bordes visuales del OS
        primaryStage.initStyle(StageStyle.TRANSPARENT);

        // Inicializamos nuestro arrastre de ventana personalizado
        calculatorUI.setupDraggableWindow(primaryStage);

        primaryStage.setScene(scene);
        primaryStage.show();
    }

    public static void main(String[] args) {
        launch(args);
    }
}
¡Excelente trabajo! Acabas de integrar conceptos robustos sobre estilización libre (undecorated), transiciones suaves de componentes y estructurar variables escalables con hojas de estilo para CSS.
Si te interesó el poder de estilización pero no tienes tiempo de ensamblar manualmente esta extensa arquitectura, puedes bajarte directamente el código fuente funcional:
Contiene la carpeta de recursos de Maven / SDK y el archivo Batch simple que usamos universalmente en tutoriales previos para la rápida compilación.